How Cloudflare Works: Part 2 — Testing & Hardening

Welcome back!
In Part 1 we broke down Cloudflare from a security blueprint perspective: DNS delegation to Cloudflare, proxied records hiding the origin IP, traffic always hitting the global edge network first, filtering and caching before anything reaches your server.
That was the structural view.
This part is about putting it under the microscope. We wanted to see if the protections actually behave the way the docs and dashboard imply. So we ran these tests on cybersechub.org from own static GitHub Pages site routed through Cloudflare. Everything here is on infrastructure we control. If Cloudflare is protecting your deployment, run these yourself.
Step 1: Confirm the Site Is Actually Behind Cloudflare
Nothing else matters if traffic skips the edge.
From any terminal (e.g., kali):
dig cybersechub.org +short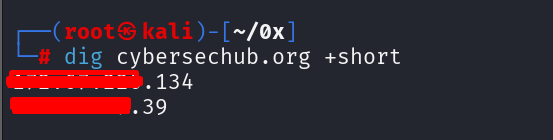
If the IPs match Cloudflare’s published ranges (full current list: https://www.cloudflare.com/ips/), requests are proxied. Users connect to Cloudflare first—not GitHub Pages directly.
Headers add more evidence:
curl -I https://cybersechub.org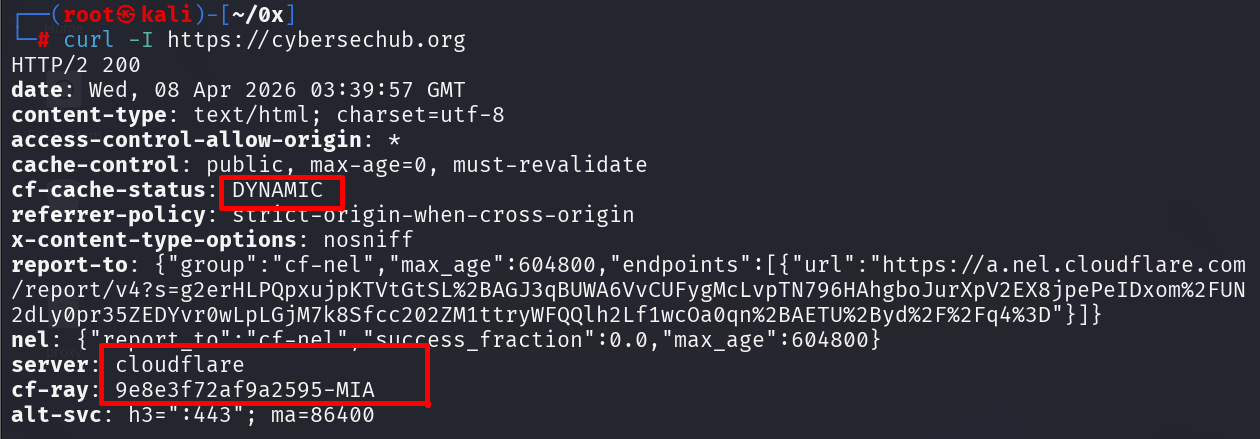
The Cf-Ray header (with Ray ID and POP code like SJC or ATL) confirms the request was processed at a specific Cloudflare point-of-presence. cf-cache-status (DYNAMIC for uncached static content, HIT if cached) shows edge handling.
DNS delegation check:
dig cybersechub.org NS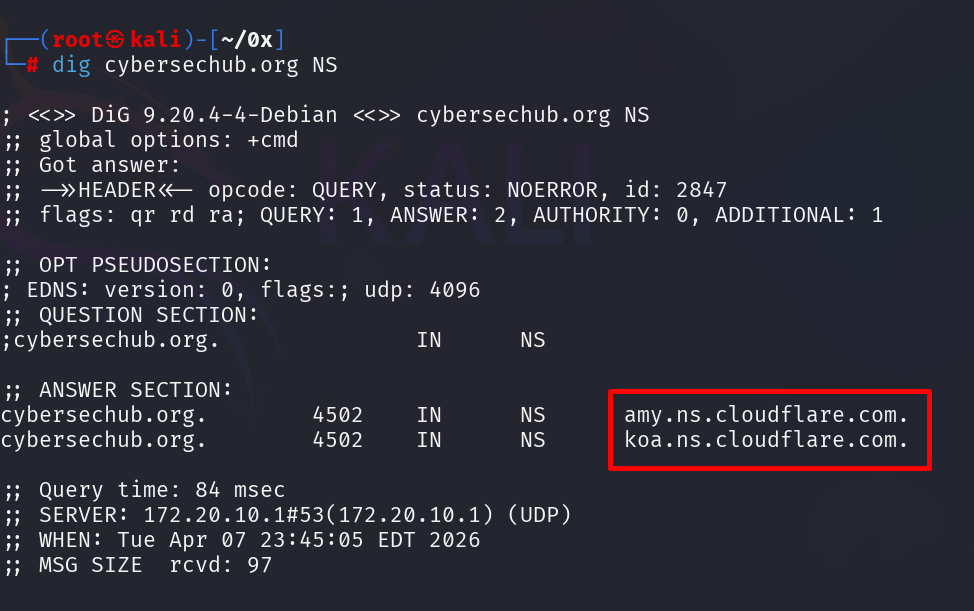
Cloudflare nameservers mean DNS resolution is delegated. No delegation = no edge = no security layers.
Step 2: Validate TLS Configuration (Full Strict Mode)
With routing confirmed, check encryption across the full path.
Dashboard path: SSL/TLS → Overview
We set the mode to Full (strict).

Why strict?
- Flexible: Only encrypts user → Cloudflare (back leg to origin is plain HTTP - major downgrade risk).
- Full: Encrypts both legs but does not strictly validate the origin certificate.
- Full (strict): Encrypts end-to-end and requires a valid, trusted certificate on the origin (GitHub Pages qualifies).
We leave it on strict in production because encryption without validation is incomplete.
Step 3: Test the Web Application Firewall (WAF)
Cloudflare’s managed rules are designed to inspect and block common attack patterns. On a traditional web application, rules would catch SQL injection, XSS, CSRF, and other injection attacks.
Harmless test payload:
curl -v "https://cybersechub.org/?id=1%27%20OR%20%271%27%3D%271" 2>&1 | head -30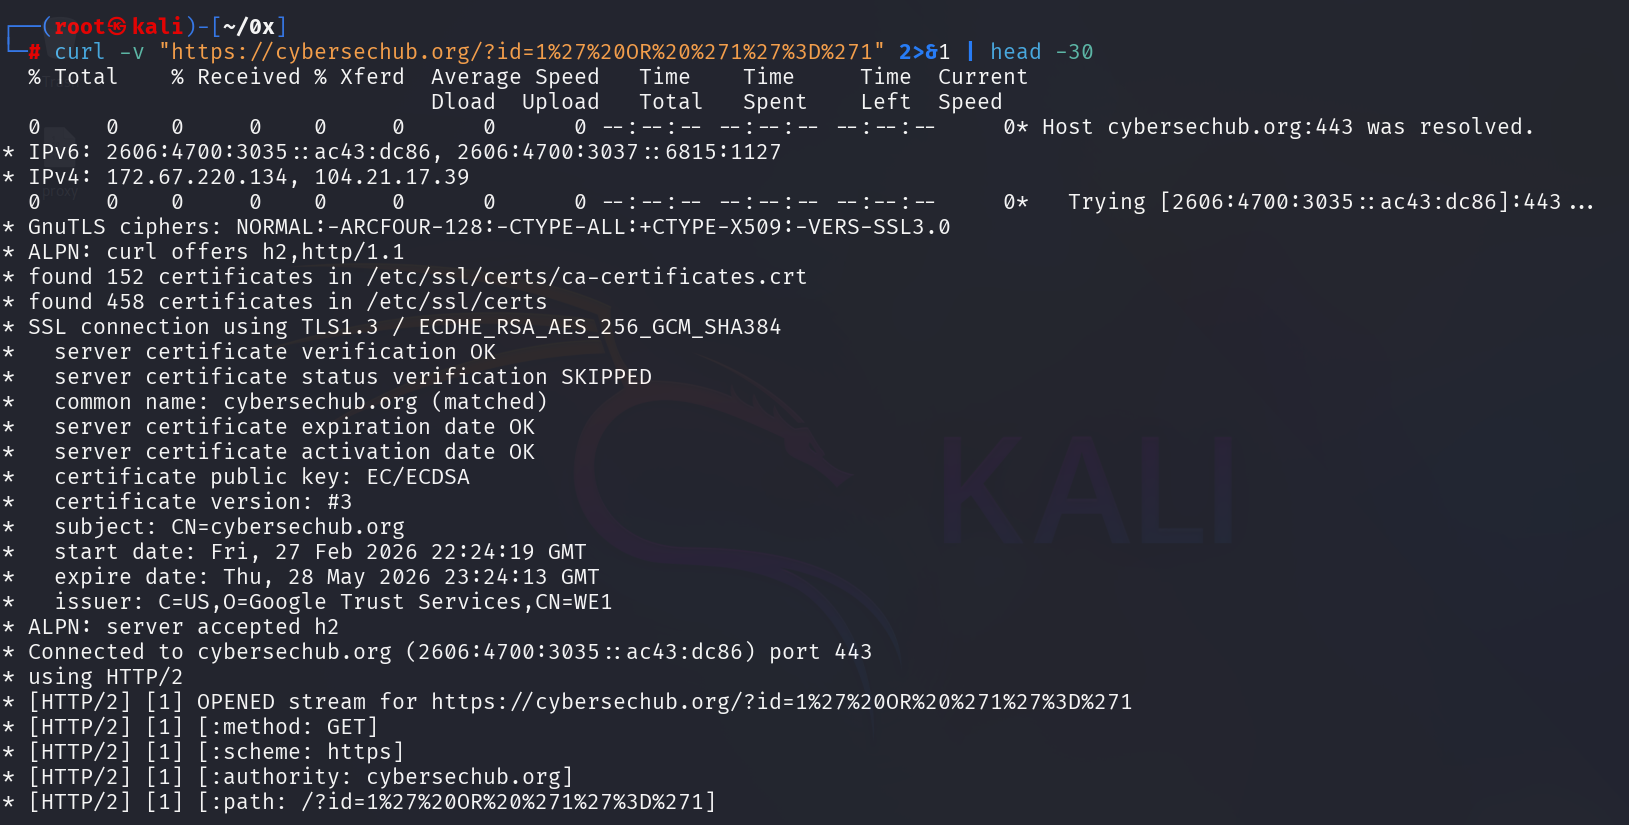
Key insight: On a static GitHub Pages site, the WAF won’t block SQL injection payloads because there’s no backend processing the request. Cloudflare’s WAF sees the query string as harmless and lets it through—there’s nothing to exploit.
This reveals an important truth about WAF protection: it’s context-dependent. The value of WAF on static sites lies elsewhere—in DDoS protection, bot mitigation, and rate limiting—not SQL injection detection. For a traditional web application with a database or backend API, this payload would trigger a block; on a static site, it’s meaningless noise.
This isn’t a weakness of Cloudflare—it’s a demonstration of how defense-in-depth works: different layers protect against different attack surfaces. Static sites don’t need SQL injection protection; they need protection from traffic floods and malicious bots.
Step 4: Validate Rate Limiting Under Controlled Load
Rate limiting protects against scraping, floods, or brute-force noise.
Dashboard: Security → WAF → Rate limiting rules
We created a temporary rule: block after exceeding threshold on the root path (/).
Then simulated load:
for i in {1..50}; do curl -s -o /dev/null -w "%{http_code}\n" https://cybersechub.org; done
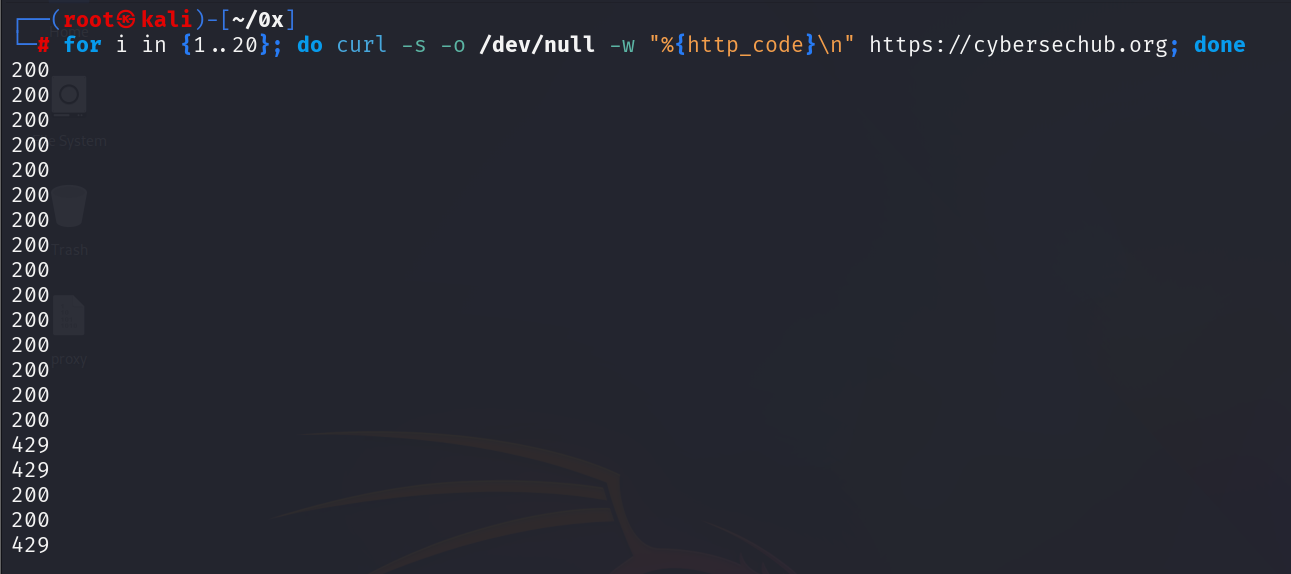
Initial 200 responses, then 429 once the limit triggers—that transition is enforcement. If it stays 200 forever, the rule isn’t applying correctly.
Step 5: Enable Bot Mitigation
GitHub Pages has no server-side logic to filter requests. Cloudflare’s edge is the only defense layer.
Dashboard: Security → Bots
Enabled Bot Fight Mode.
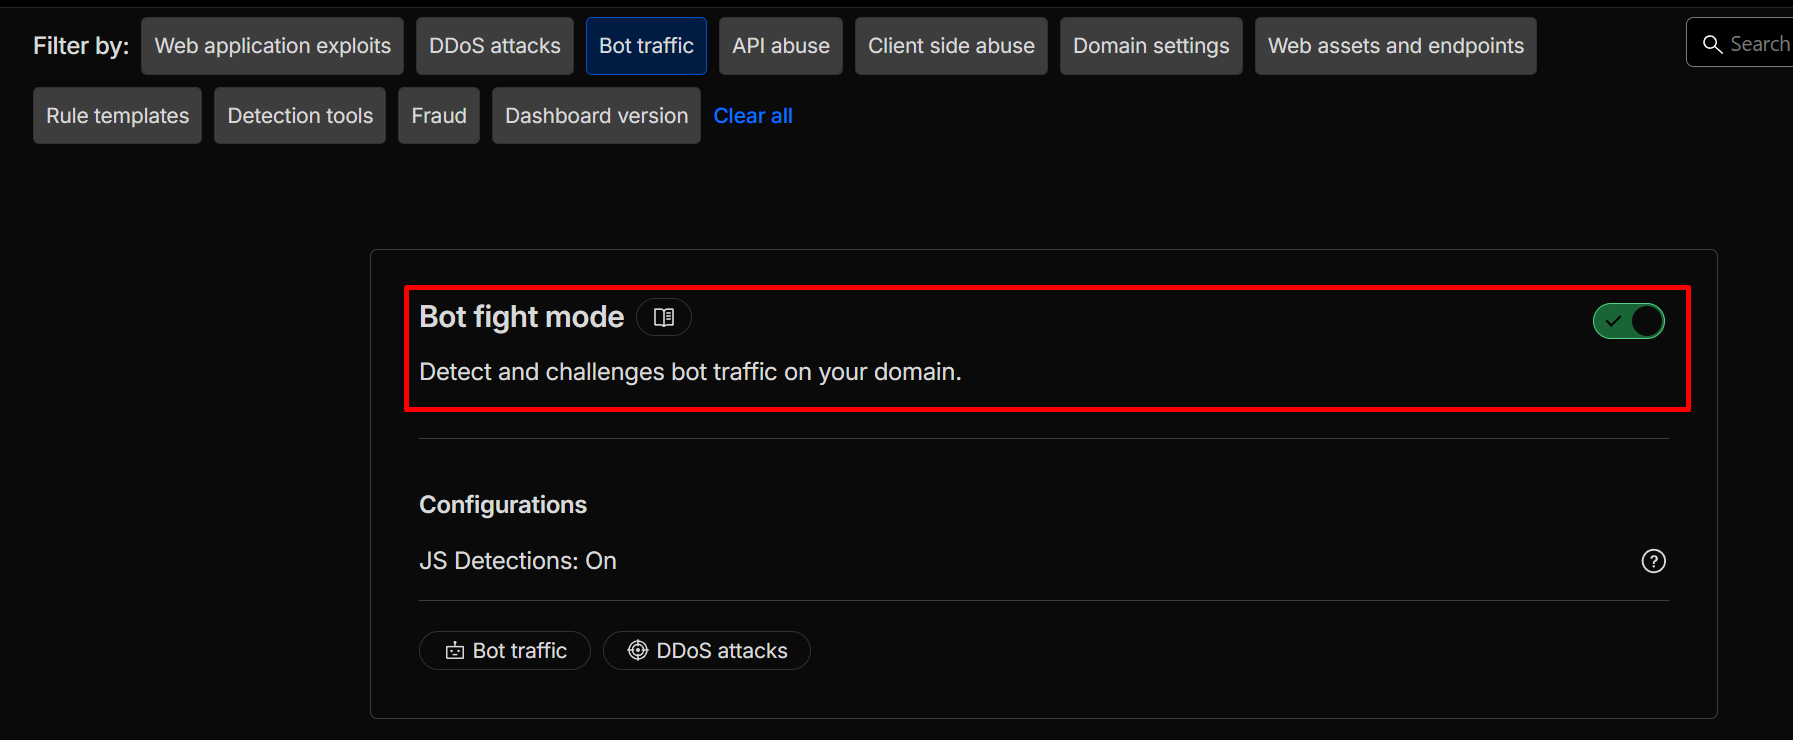
Bot Fight Mode detects and challenges known malicious automation (scrapers, credential stuffers, scanners). It’s lightweight and effective for static sites.
Later, check Security Events to see challenges or blocks on suspicious traffic.
Step 6: Enable DNSSEC
Security starts at DNS resolution—if it’s spoofed, everything downstream fails.
Dashboard: DNS → DNSSEC → Enable
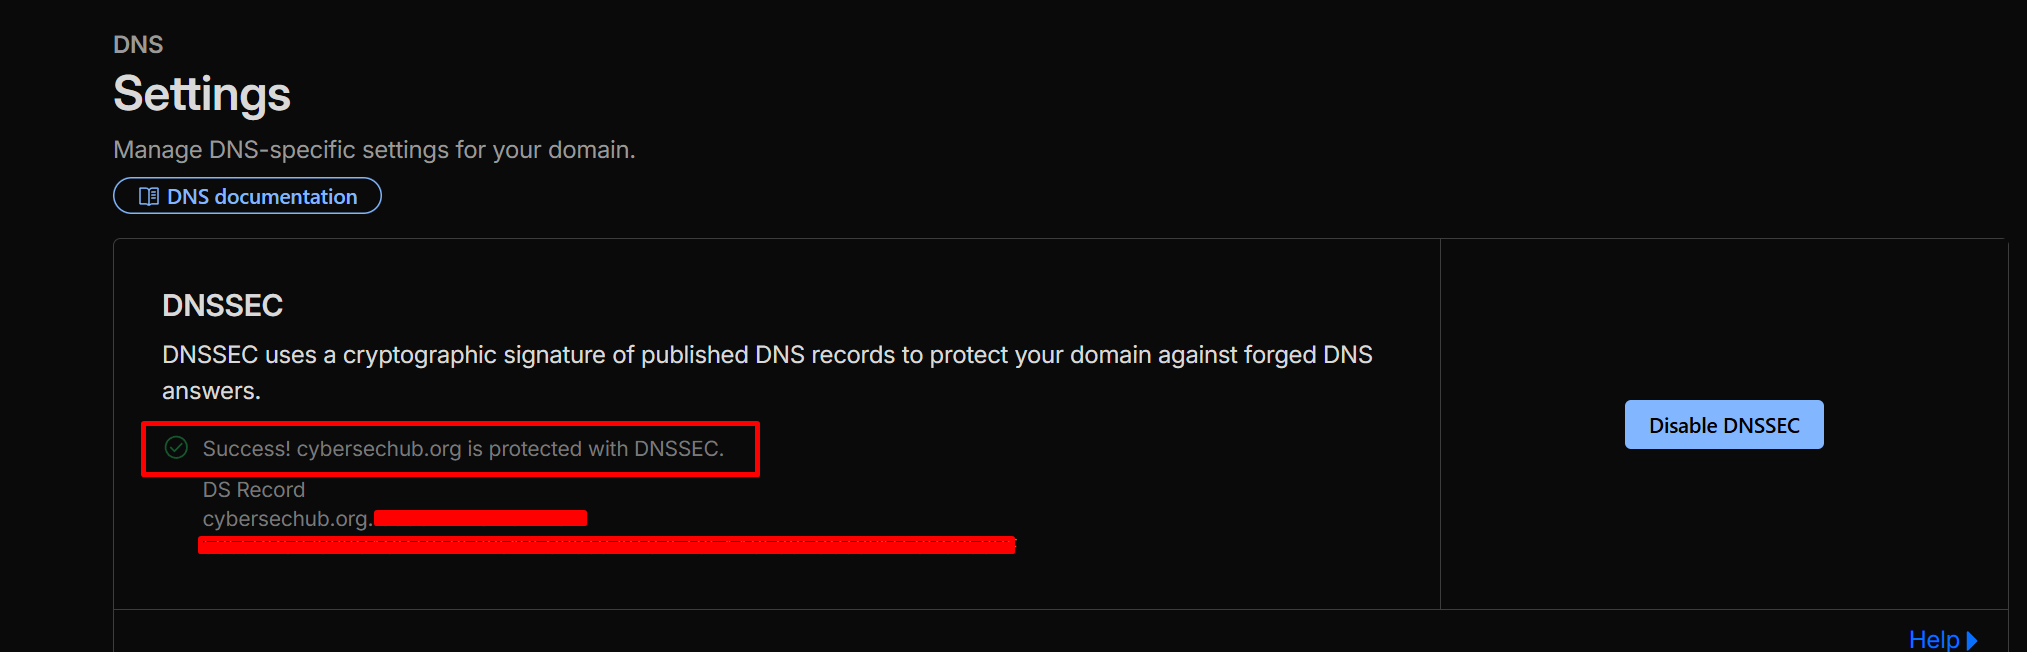
DNSSEC signs responses cryptographically, preventing cache poisoning and spoofing attacks.
The Hosting Model
cybersechub.org runs as:
User → Cloudflare edge → GitHub Pages
No VPS exposed. No inbound ports. No origin-level firewall or hardening needed.
All protection-proxy routing, strict TLS, WAF inspection, rate limiting, bot mitigation, DNSSEC-happens at the edge. That’s the modern pattern for static deployments: move security upstream.
Summary
After these checks on cybersechub.org, Cloudflare is no longer just a CDN or traffic accelerator. It’s actively functioning as layered security: traffic proxied through the edge, TLS enforced end-to-end with strict validation, WAF inspecting and blocking malformed input, rate limits enforcing under load, Bot Fight Mode challenging automation, DNS responses signed.
Not because we enabled features in the dashboard. Because we sent requests, watched responses, and saw the behavior match expectations.
Stay curious!